This continues instuctions how to build an arched footbridge out of Redwood or Cedar part 1.
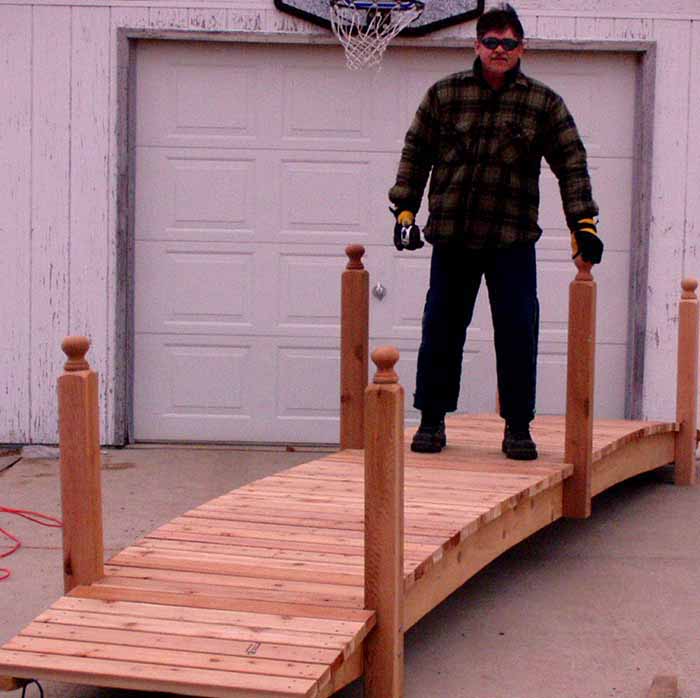
Adding Posts to the Bridge
If you choose to add posts and rails to your cedar garden bridge you will need 2 – 8 ft. long 4 x 4 posts. Cut them into 32 inch lengths. You can add your choice of posts caps by finding the center of the top of each post marking it with a pencil and then drilling a hole 1 inch deep into the post with a small drill bit. Add a small amount of water proof wood glue on top of the post where the cap will sit and screw the post caps onto each of the posts. Make sure you screw in straight and the cap is secure.
Next you need to find the exact center of your bridge then mark that center 2×4 plank.Then you will need to decide where you want your outside posts on the ends of the bridge, the 3rd or 4th plank from both ends works best, and mark those. You now need to draw a line with a pencil across the ends of these planks, even with the outside edge of the support beams on both ends (so you can cut off the excess). Then remove the (3) 2 x 4 planks (the center plank and the 2 planks on the ends where the posts will sit. After removing the planks from the bridge cut them off where you have traced your line. Place the 3 floor planks back on the bridge and put in the screws and tighten them. The planks will now be even with the outside edge of the supports and allow room to attach the posts..
Next you will need to drill 2 holes into the bottom of the posts for the bolts with a 1/2 inch drill bit. Drill one hole at 1 inch from the bottom of the post and another at 3 inches from the bottom. Make sure your holes are centered horizontally. After drilling holes in each of the posts, line up the posts where they will be placed on the bridge and put your pencil through the bolt holes and carefully mark where to drill the 1/2 inch holes into the beams.
After all the holes are drilled in the posts, line up the posts to the beams and insert 5/16 bolts, 6 inches long through the posts and into the support beams. Then place a washer and nut on the inside and tighten.
Attaching Rails to the Bridge Posts
You will need 2 x 2 rails cut to the length of your bridge. Hold the rail up to the inside of the posts so you can measure where to drill the holes. Raise it up to the bottom of your post cap. Drill a small hole through the rail all the way through to the post. Put in a # 8 stainless steel screw (2 3/4 inch long) and carefully tighten. Move to the middle post and do the same by drilling hole through the rail and post and put in the screw and tighten. The last post is more difficult. You carefully lower the rail down to the post and drill your hole and put in the screw and tighten. You must be careful on the last post due to the bending of the rail and could end up breaking if there is too much stress on the rails due to a high arch on the bridge. Do the same on the other side and that’s all there is to it.
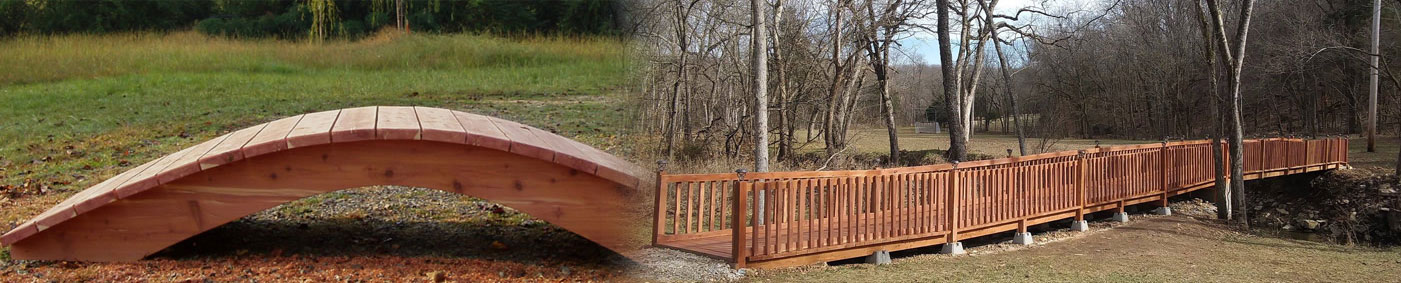
Finished Garden Bridge with Posts and Rails

See Testimonials from those who have used these instructions to build their own bridges
Return to How to Build An Arched Footbridge – Part 1
As always I am here if you have any questions.
© February 14, 2005
Rod Bird
Handcrafted Garden Bridges
All Rights Reserved